Introduction
The goal of this assignment was to work with processing multi-spectral imagery in Pix4D and using that imagery to complete a value added data analysis of vegetation health for a site in Fall Creek, Wisconsin.
The camera used to capture the imagery for this assignment was a MicaSense RedEdge 3. This camera is capable of taking five photographs in five different spectral bands. This technology allows for more precision in agriculture and vegetation analysis than a standard RGB sensor. The five different bands in order from shortest wavelength to longest are as follows: band 1 is the blue filter, band 2 is the green filter, band 3 is the red filter, band 4 is the red edge filter, and band 5 is the near infrared (NIR) filter. The RedEdge camera also requires specific parameters for proper image capturing and analysis. The following table (table 1) is a list of those parameters from the RedEdge user manual.
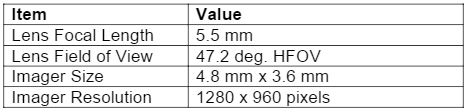 |
| Table 1: MicaSense RedEdge 3 sensor parameters |
Methods
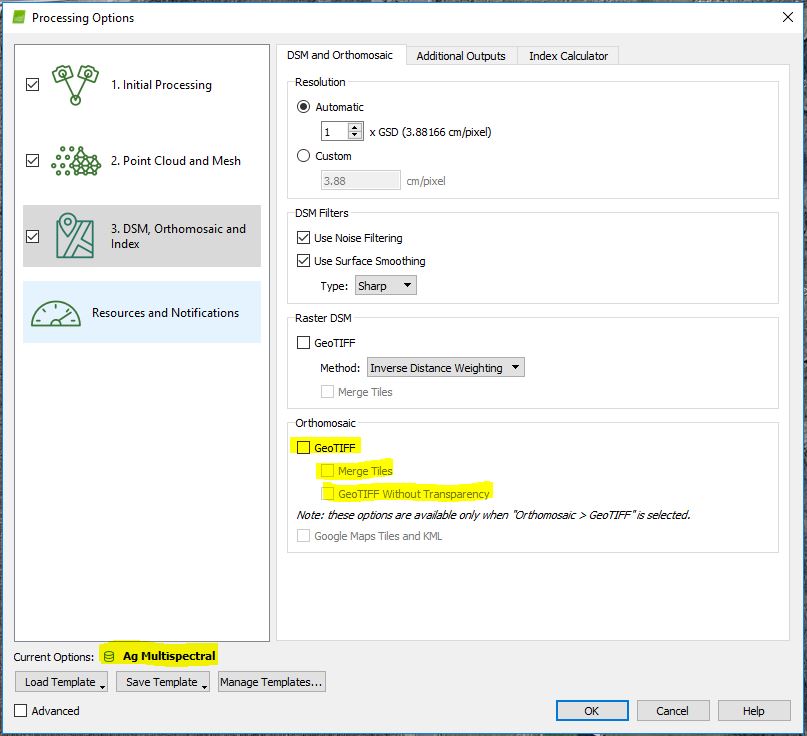
The first step for this assignment was to process the flight imagery taken from the site in Pix4D. This was done using the same methods as previous assignments, however this time, the Ag Multispectral template was used. This creates five orthomosaic geotiffs, one for each of the spectral bands. In figure 1, the template is shown to be set to
Ag Multispectral. This didn't automatically produce the orthomosaics that were needed for further analysis, so the orthomosaic geotiff and subsequent options were checked.
 |
| Figure 1: Pix 4D processing options |
Once processing concluded, the next step was to compose all five of the spectral bands into one RGB orthomosaic. To do this, the various geotiffs for each of the bands were brought into ArcMap and the "composite bands" tool was used. This tool works by entering each of the five spectral bands as input rasters. Then the user simply assigns a name and location to the output raster and the composite is created.
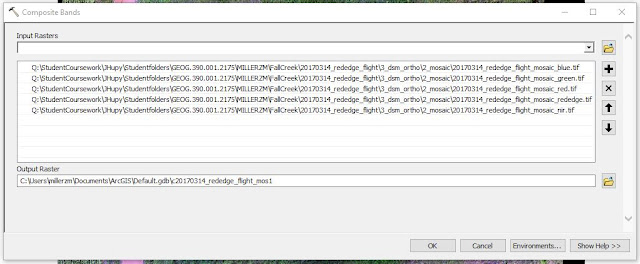 |
| Figure 2: Composite Bands tool in ArcMap |
After the composite raster was created, the raster was copied twice to produce a false color infrared orthomosaic and a red edge orthomosaic in addition to the original RGB orthomosaic. To adjust the original RGB orthomosaic, the layer properties' symbology tab was used. The bands were adjusted to show various light filters and better analyze vegetation for the site (figures 3 and 4).
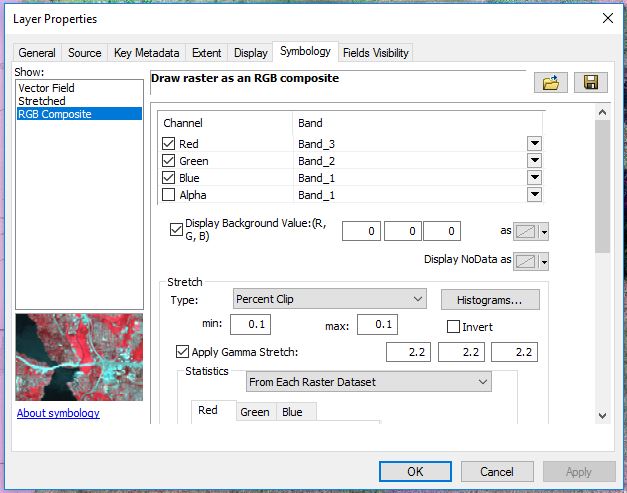 |
| Figure 3: Adjustments to the symbology in the layer properties for the RGB composite |
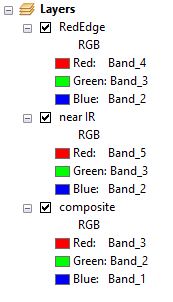 |
| Figure 4: Various composite layers |
Three maps were then produced in ArcMap with the different multispectral layers (see results section). From there, the next step was to perform a value added data analysis in ArcGIS Pro. This analysis shows permeable and impermeable surfaces for the given site. To do this, steps for value added data analysis from assignment 4 were used in conjunction with the data from this assignment.
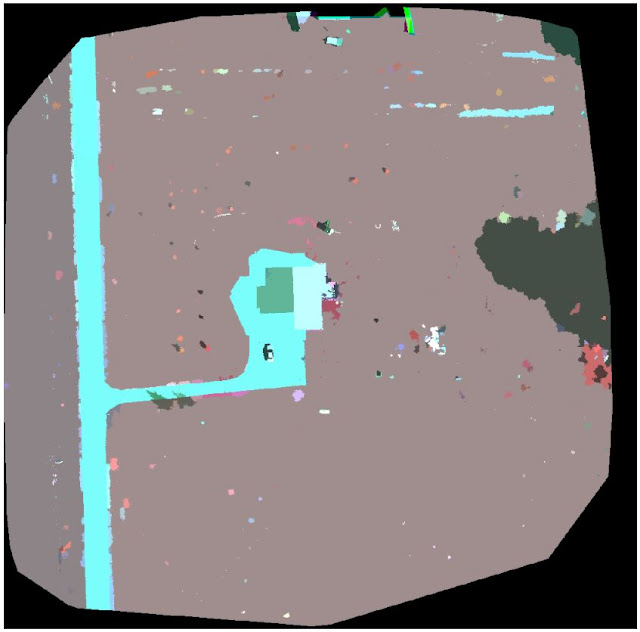
The first step was to segment the imagery (figure 5). This makes the spectral band values less complex and better helps the user break up the imagery into permeable and impermeable surfaces. Segmenting the imagery in ArcGIS Pro was done by bringing in the composite raster and following the prompts from the tool.
 |
| Figure 5: Segmented Imagery |
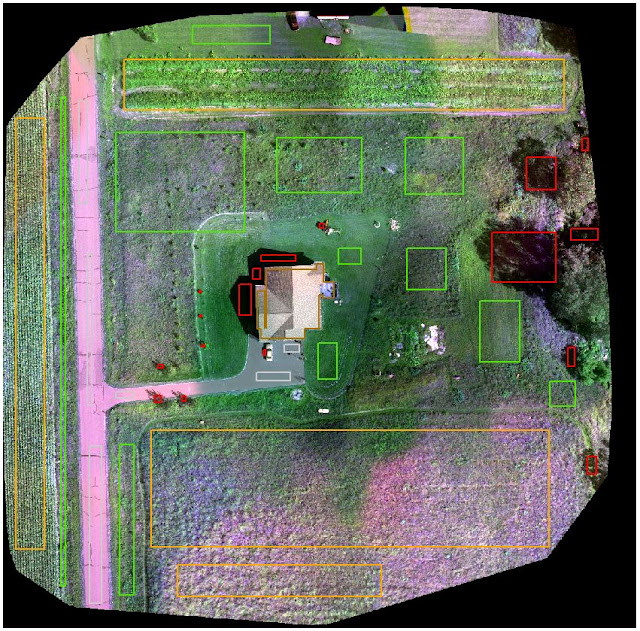
After the imagery was segmented, the next step was to classify the imagery into different surfaces. This was done by looking at the composite image and assigning areas to certain classes (figures 6 7, and 8). The five classes chosen were: roads, cropland, grass, shadows, and house/car.
 |
| Figure 6: Surface classification |
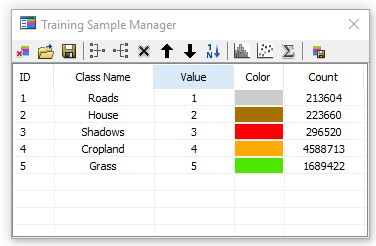 |
| Figure 7: Training sample manager with 5 custom classes |
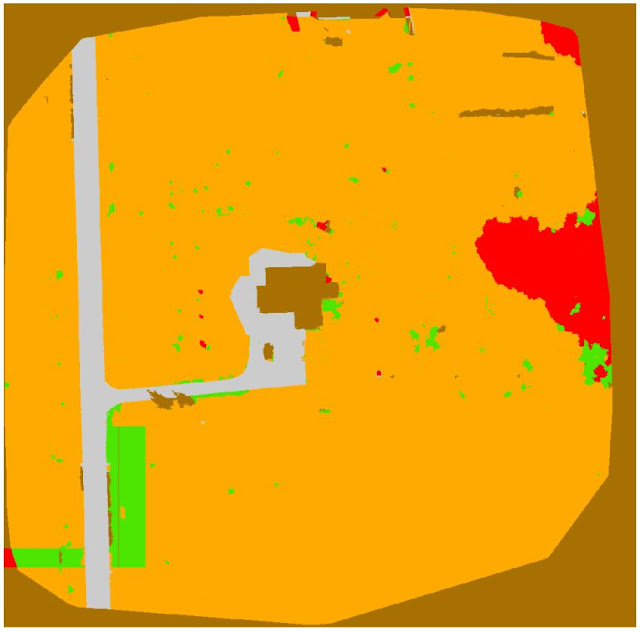 |
| Figure 8: Result of classification |
After the imagery was classified, the final step was to undergo reclassification in which the classified imagery was categorized into pervious and impervious surfaces (aka permeable impermeable surfaces). This was done by entering values of 0 for impervious surfaces and 1 for pervious surfaces (figure 9 and table 2).
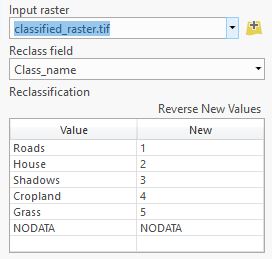 |
| Figure 9: Reclassify tool |
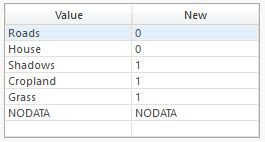 |
| Table 2: Pervious and impervious reclassification |
This resulted in a value added rendering of the original data which was used to make a map showing the pervious and impervious surfaces of the site.
Lastly, a normalized difference vegetation index (NDVI) map was created. This map shows health of vegetation, and is analyzed in a similar way to the false color maps made for this assignment. Since the Ag Multispectral template was used when processing the imagery in Pix4D, an NDVI raster was produced. The map was made by layering the NDVI with the DSM also produced in Pix4D and using a hillshade effect.
Results
 |
| Map 1: RGB Orthomosaic |
Map 1 shows a conventional red, green, and blue band orthomosaic image. Due to combining the images of each color band together and having somewhat poor images to work with, some of the areas on the map appear to contain more red hues than in real life. Still, the viewer can make out what objects in the image represent and can interpret the "pinkish" grass-covered area in the southern portion of the image as an area with poor vegetation health. If these areas contained healthy vegetation, they would most likely be green, much like the crop field on the western portion of the map. Since this image is in a standard RGB display, there is a possibility of the poor vegetation areas and the unusual pink hue shift being attributed to the quality of the images taken in this flight. Perhaps a different color band rendering will help to determine uncertainties with map 1.
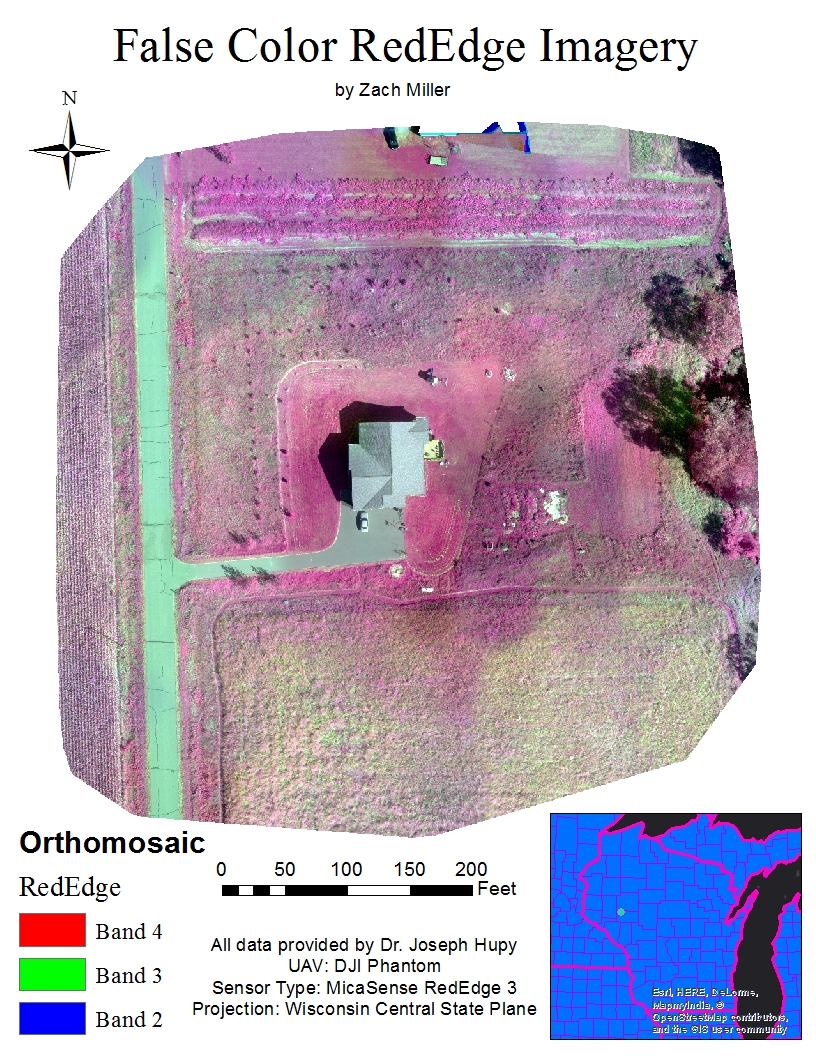 |
| Map 2: False color map using RedEdge band |
The MicaSense RedEdge 3 stands tall in terms of understanding vegetation health. Because the sensor is capable of taking images in five distinct spectral bands, the user is able to produce more definitive false color imagery like that of map 2. In map 2, band 4 (red edge); band 3 (red); and band 2 (green) were used instead of red, green, and blue like in map 1. Using these particular bands in this order shows highly reflective areas (a.k.a. areas of healthy vegetation) as red; this would be the reasoning for the term "false color", and poorly reflective areas/areas of poor vegetation health as green. In the map above, areas such as the hedges between the two properties on the northern edge of the map, trees, and the owner's lawn are saturated with red. Recalling speculations about the previous map about vegetation health, the unkempt grassy area covering the southern portion of the map and other speckled areas containing pink, unhealthy vegetation are verified by this map.
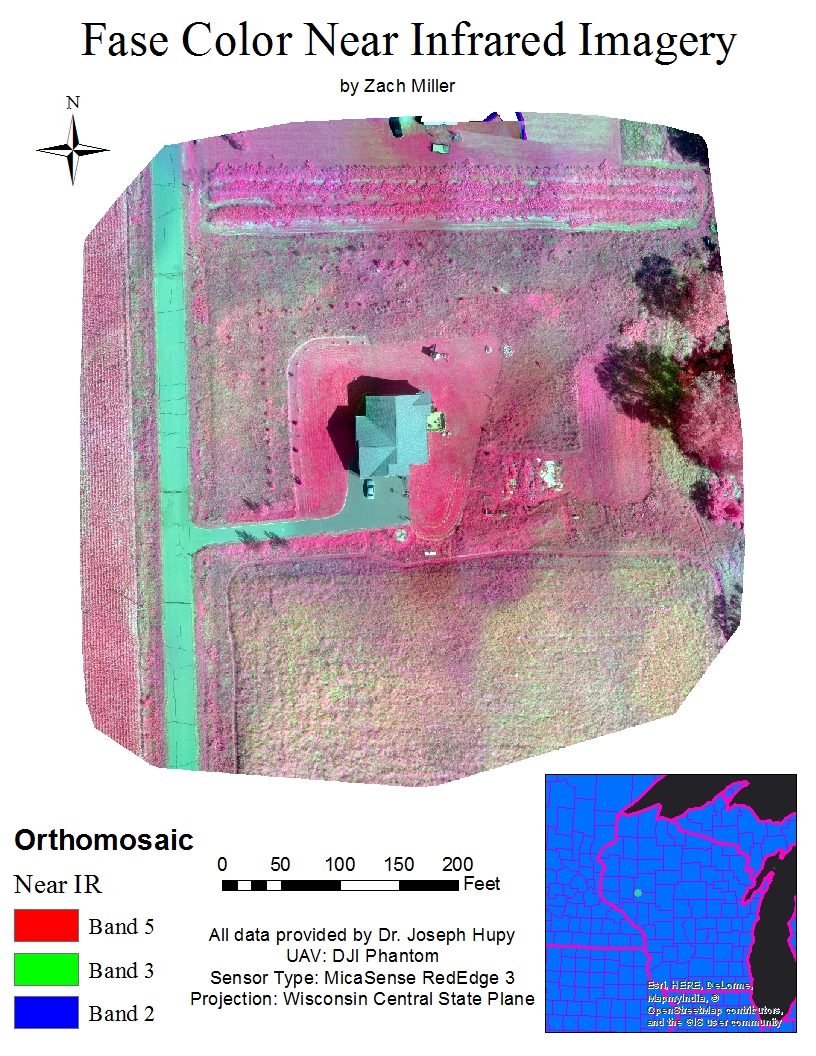 |
| Map 3: False color map using near infrared band |
Comparing map 3 to map 2, there isn't much difference between the two. Both are false color renderings except, one uses the RedEdge band and the other uses the near IR band. Using the near IR band saturates the areas of healthier vegetation even further. It appears this helps to distinguish large areas of healthy vegetation from large areas of unhealthy vegetation, however some of the finer detail in vegetation health variance is lost by this saturation. The hedge between the two properties and the unkempt area to the right of the homeowner's lawn are good examples of this loss due to color saturation.
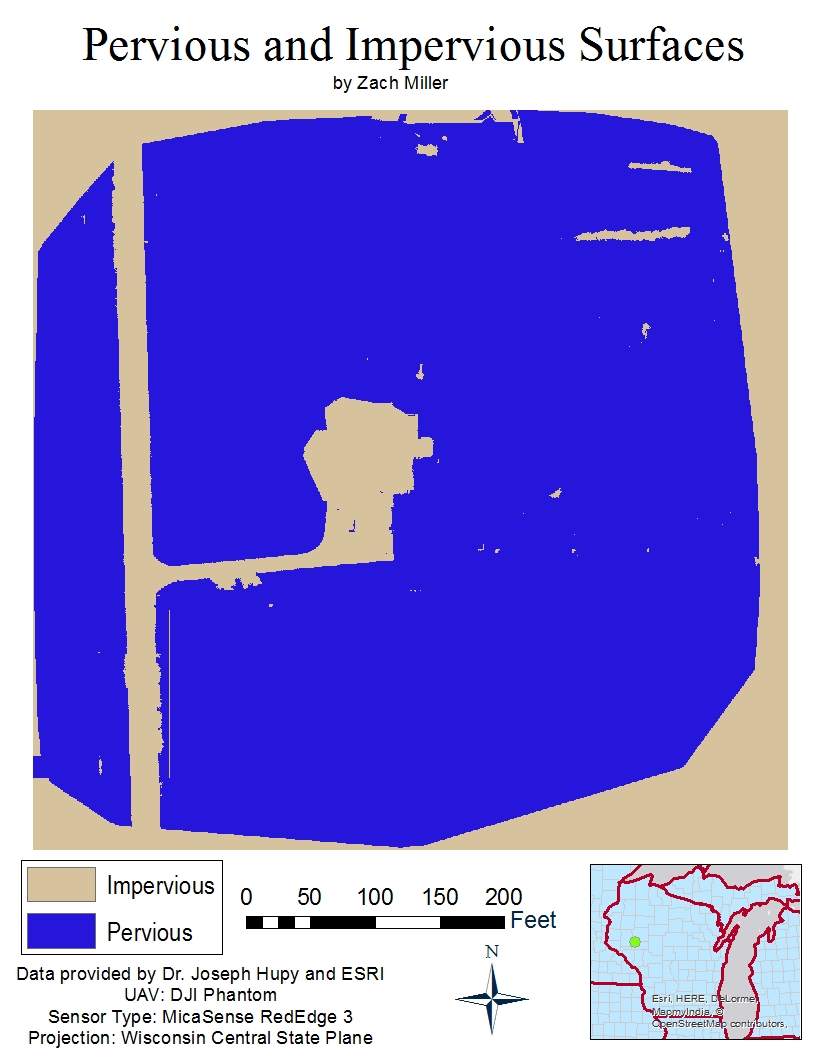 |
| Map 4: Value Added Pervious and Impervious Surfaces |
In map 4, areas in blue show pervious (or permeable) surfaces and areas of khaki show impervious (or impermeable) surfaces. Some of the impervious areas near the top right of the map are in fact pervious, but ArcGIS Pro interpreted them as being impervious. This could be due to the quality of the imagery or user error when classifying the segmented imagery. Also, the entire boarder surrounding the image got accounted for as an impervious surface, however this area shouldn't have been included.
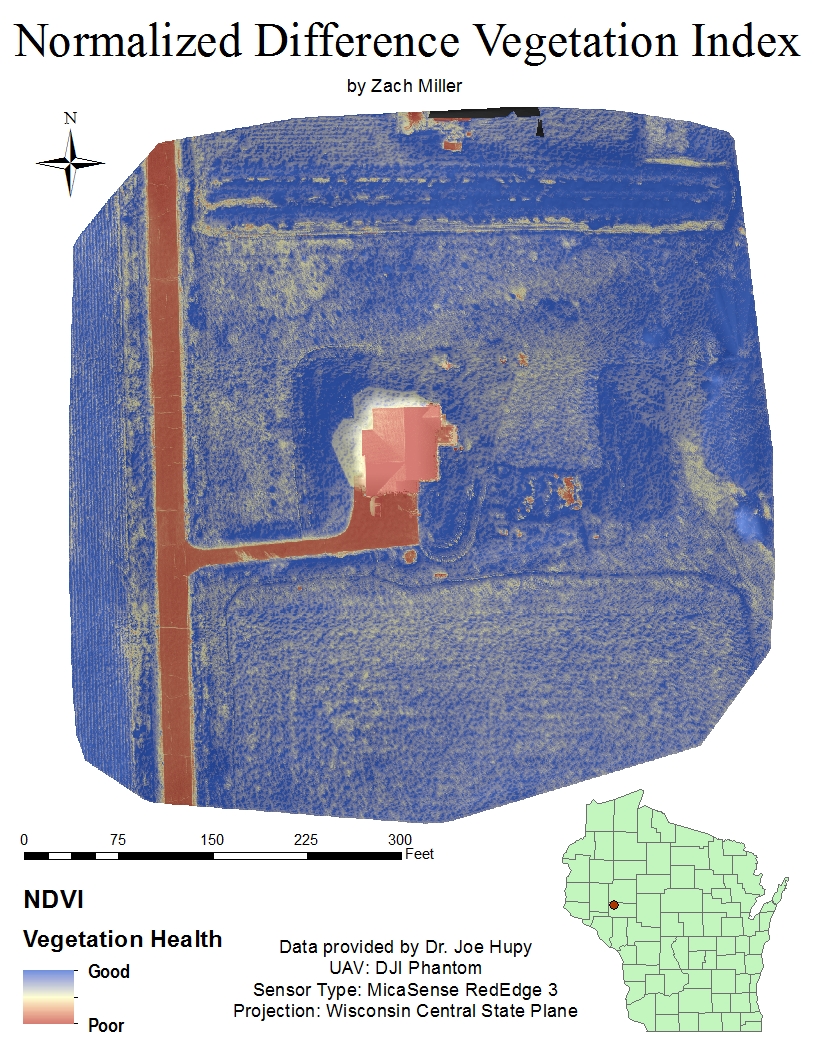 |
| Map 5: NDVI raster |
The fifth and final map of this analysis is of course map 5. Because the Ag Multispectral template was used in the image processing with Pix4D, an NDVI raster was produced. With the gradient used for this map, features of the landscape become enriched and areas of poor vegetation health are shown in a rusty red color while areas of good vegetation health are shown as indigo. Over larger portions of vegetation with similar health, such as the southern area of grass, the user is able to see in great detail variances in vegetation health. There also seems to be minimal false interpretations of values in this map with the only real exception being the shadow cast by the house.
Conclusions
It is clear that using the Ag Multispectral template in Pix4D as well as the MicaSense RedEdge 3 sensor is a fantastic option for farmers, biologists, golf course management, and other similar applications. This technology allows the user to really gain an in depth analysis of the health of their vegetation. Set backs to this technology would include the large potential for false information from user error. During the flight that collected the images used for this analysis, the pilot accidentaly had the camera on while the UAV was climbing to its planned flight altitude. Mishaps such as this have an effect on the quality and accuracy of the analysis. If I could do this assignment over again, a potential fix for this mistake could be to eliminate those images from processing altogether. If images from UAV are taken with great care and accuracy and the user completes all the data manipulation steps correctly, this technology has the potential to provide cutting edge agricultural and other vegetation-based information analysis.


No comments:
Post a Comment