The objectives of this assignment were to take oblique imagery of 3-D objects, process the images, and engage in annotation which resulted in enhanced 3-D models of the objects. Oblique imagery is obtained by flying a UAV in a circle around the object being photographed usually at an angle so that the camera is pointed at the object. Annotation is manually correcting the images so that Pix4D knows which parts of each image are the 3-D object and which parts are background. Then, in theory, the 3-D model of the object can become a more accurate representation than before. For this assignment, oblique imagery of a shed, a bulldozer, and a pickup truck were processed and annotated.
Methods
The first step for engaging in annotation of oblique imagery was to process the images for each flight. Initial processing is all that is required to annotate the imagery, however one was processed fully to be used for comparison between 3-D models with annotation and without. Once initial processing was complete, the next step was to annotate the imagery. To do this, the rayCloud viewer was turned on and the drop down menus from Cameras>Calibrated Cameras were selected (figure 1).
 |
| Figure 1: Camera sidebar from rayCloud viewer window and annotated image of pickup truck. |
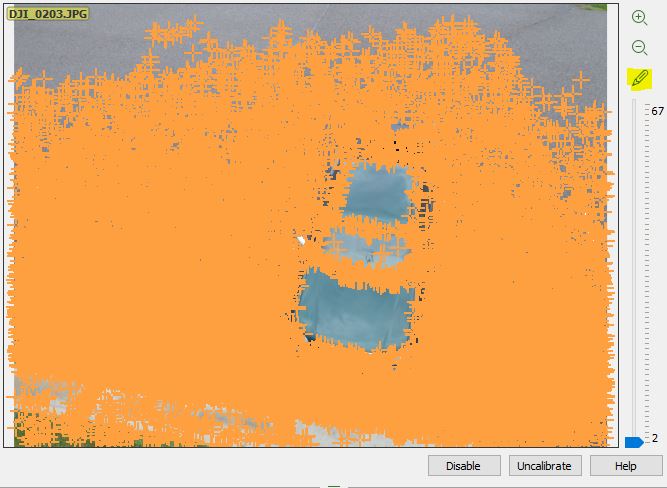 |
| Figure 2: Before annotation. |
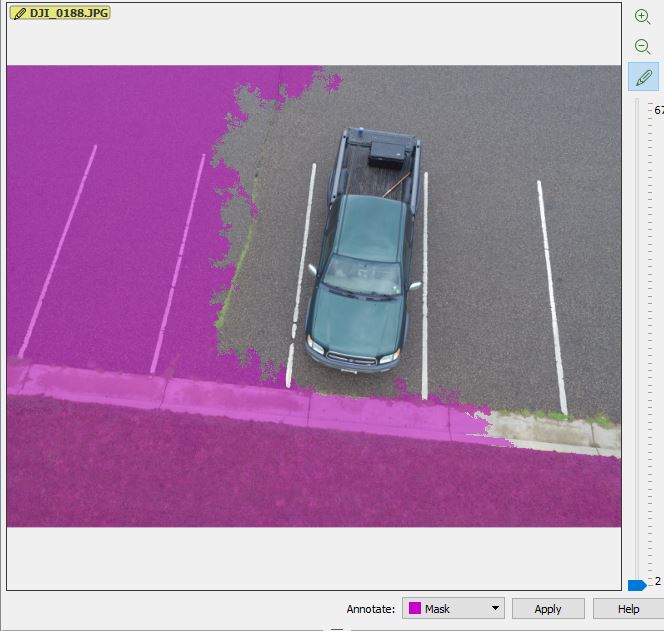 |
| Figure 3: During annotation. |
In figure 3, masked areas are magenta and these are the areas that were already annotated. Annotation was done by clicking and dragging the mouse around the image until the object of interest was the only thing left not masked. This was repeated four times at different angles and the second and third processing steps were completed, using the annotation to better enhance the 3-D model generated.
Results
The first video shows a "fly with me" animation of the annotated shed imagery.
The second video shows a "fly with me" animation of the annotated bulldozer imagery.
The third video shows a "fly with me" animation of the truck imagery without using annotation.
The fourth video shows a "fly with me" animation of the annotated truck imagery.
Discussion
After the processing and annotating was complete it was clear that annotation wasn't of much help in bettering the quality of the 3D models. This could be for many reasons, one of which being that, with the exception of the shed, the imagery was already about as good as it could be. There is the potential to take better quality imagery in the first place, but for what it's worth, the dataset produced some fairly high quality 3D models even before annotation was brought into the mix. Perhaps annotating more than four to five images per model would enhance the quality as well, for instance, the discolored blob on top of the track shed. When looking at the shed's images, more of them contained open sky than in the other datasets. This means that the dataset could require more annotation in order to ensure that the open sky is not a part of the model and eliminates confusion in Pix4D's 3D model builder. Another noticeable defect, not corrected by annotation, was seen in the truck and bulldozer models. Underneath the pickup truck would most likely be transparent in reality and the wheels of the bulldozer would most likely be opaque in actuality.
Sources:
https://support.pix4d.com/hc/en-us/articles/202560549-How-to-Annotate-Images-in-the-rayCloud#gsc.tab=0
No comments:
Post a Comment